Access to your norwichuni.ac.uk account
This website contains information about your University account, including guidance on how to regain access after a Multi-Factor Authentication (MFA) reset.
Multi-factor Authentication (MFA)
As an additional security measure to help protect your University account, we have made Multi-factor Authentication (MFA) compulsory. MFA is an extra layer of security for your account, asking you to verify using a second factor, such as a code from an app on your phone. So, if someone gets hold of your password, they still won't be able to get into your University account because they need your phone.
Before you can access your account for the first time (or after an MFA reset), you'll need to set up your second factor for authentication as instructed below. You will not be able to access your account until you complete the MFA setup.
Enabling Multi-Factor Authentication
What you need to do
Your first task before accessing your account for the first time (or after an MFA reset) is to register for Multi-factor Authentication (MFA) via https://aka.ms/mfasetup.
Once that's done, check that you can access your University account and 365 Apps via https://www.microsoft365.com/.
You must then re-connect personal devices to eduroam (when you return to campus), set up access to your emails and sign back into services linked to your University account.
If you're familiar with your devices and applications, go ahead and complete the above steps. We've included additional guidance below, if you need it.
More detailed instructions, if you need them
Multi-factor Authentication (MFA)
Using the Microsoft Authenticator App
You must enable MFA before you can access anything else. There are two sets of instructions:
Desktop/Laptop Users. Use this set of instructions if you're completing the MFA setup on your work/study PC or laptop, and will use the Microsoft Authenticator app on your mobile phone.
Mobile Users. Use this set of instructions if you're completing the MFA setup on your mobile phone and will use the Microsoft Authenticator app on the same mobile phone.
If you don't have the Microsoft Authenticator app, you can download it from the iOS App Store or Google Play Store. Staff with managed devices can download the app through Software Centre.

You must be in the UK to register MFA.
Please use private browsing or incognito modes during the setup. Expand the set of instructons below relevant to you.
Before you start: If you have used the Microsoft Authenticator App with your University account in the past, we suggest that you delete it from the App before following the instructions below to re-register. You may also need to follow these instructions to remove the account if, at any stage, your MFA setup fails and you need to start again.
1. Launch the Authenticator App on your mobile phone and select any accounts linked to the University.
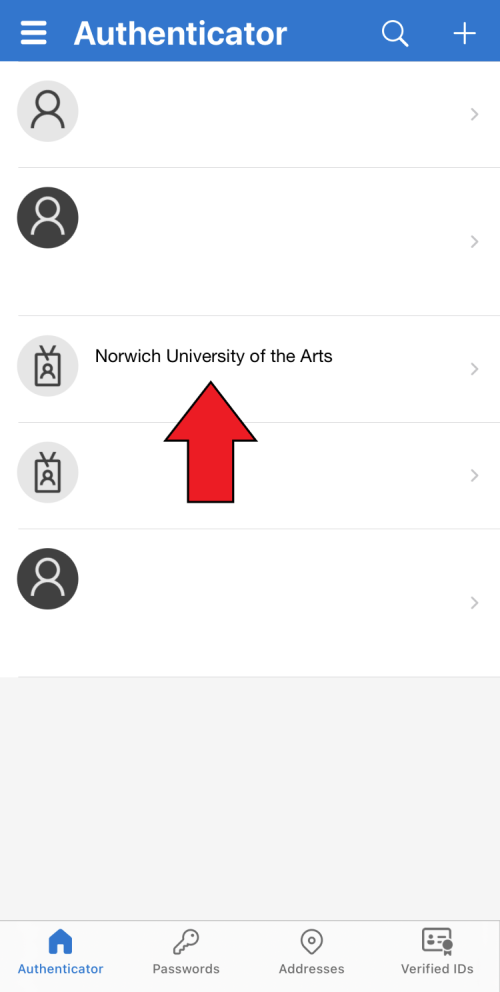
2. Click the Settings cog in the top-right corner.

3. Click "Remove account".

4. In the pop-up, choose "All apps on this device".

Now proceed to register your MFA using the instructions below.
1. On your desktop or laptop, go to https://aka.ms/mfasetup.
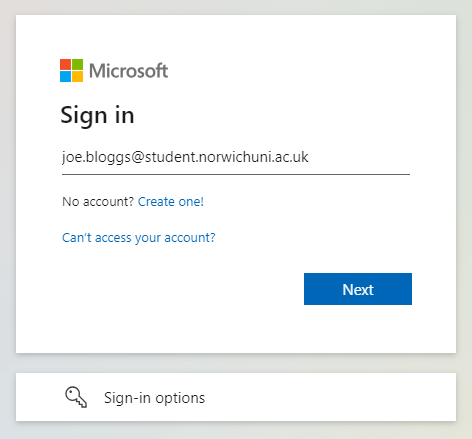
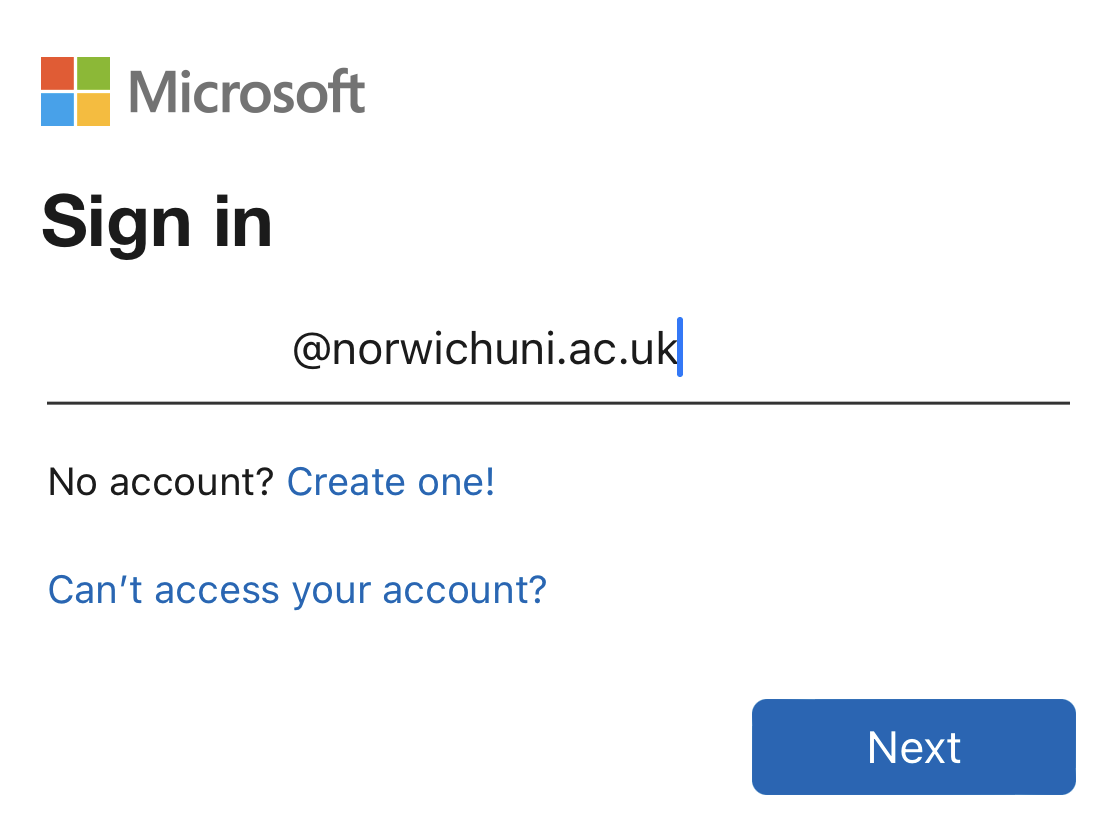
2. You will be presented with the Microsoft login page. Enter your @student.norwichuni.ac.uk (for students) / @norwichuni.ac.uk (for staff) University email address and click Next:
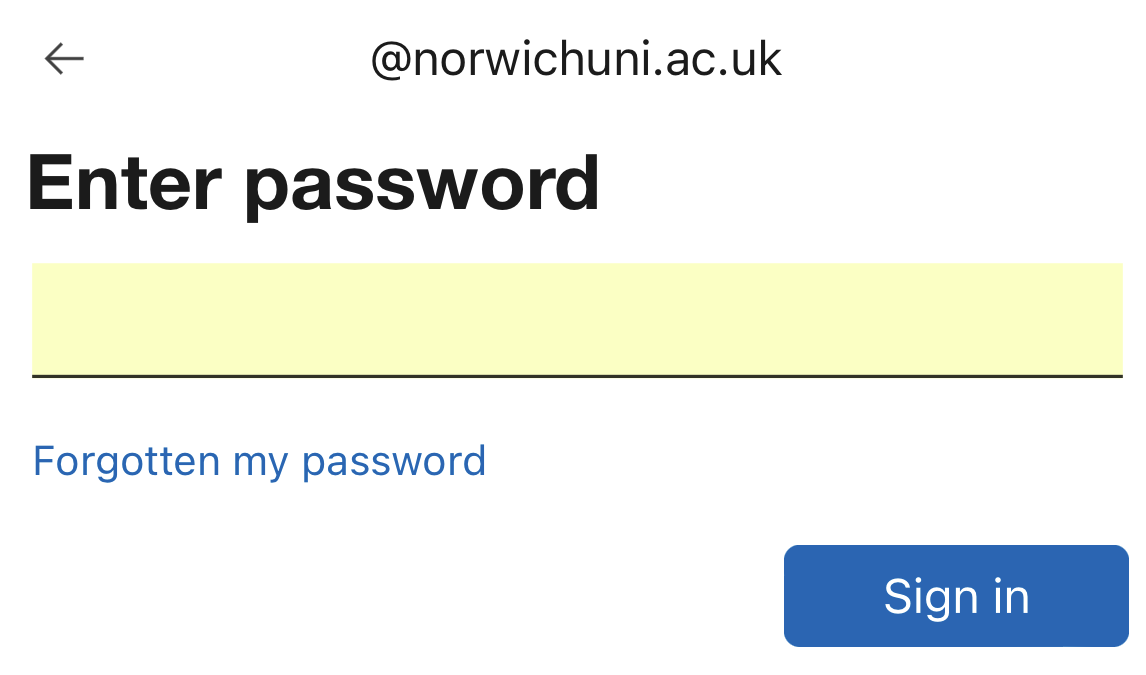
3. If prompted, enter your University password.
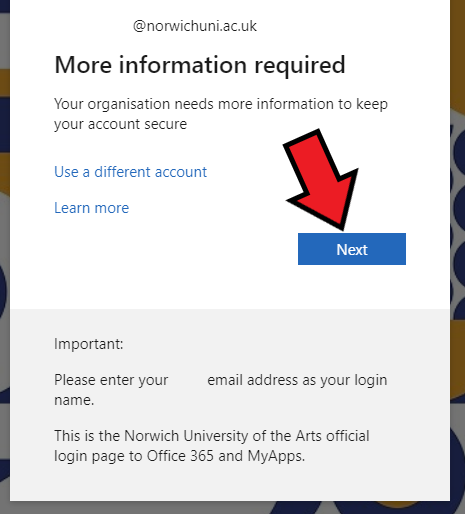
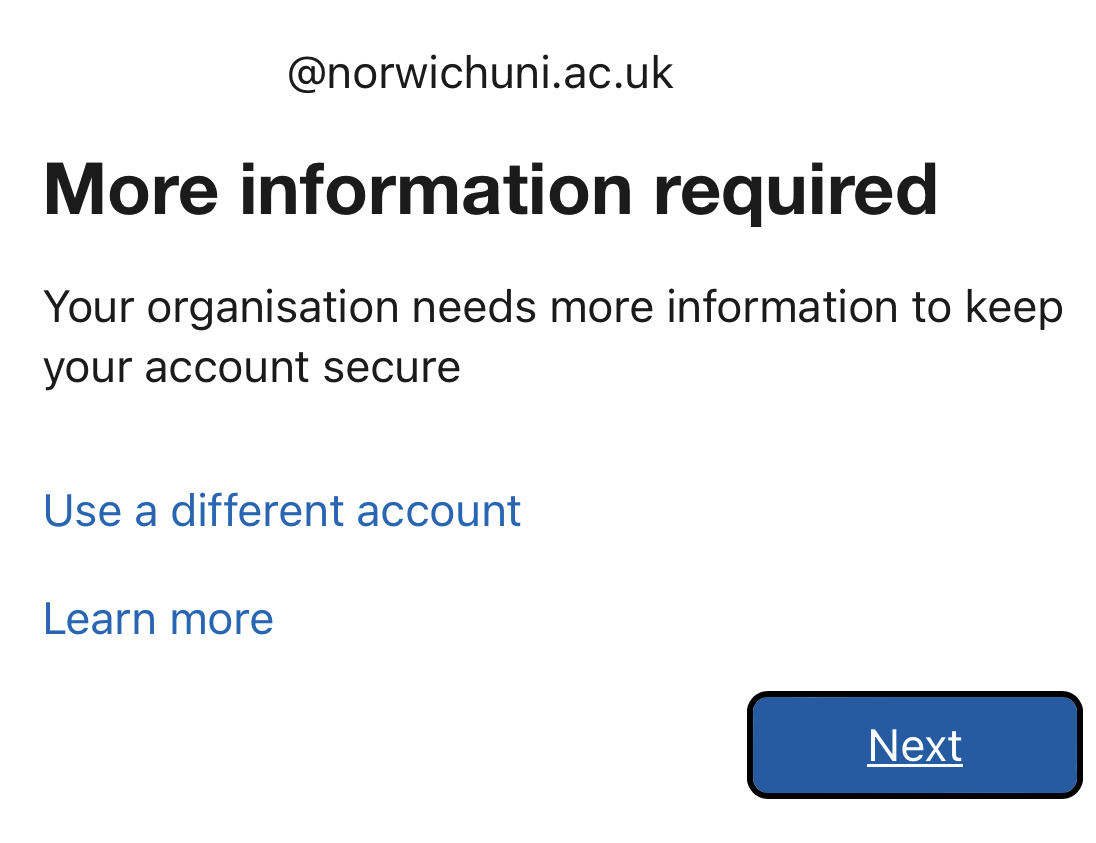
4. You'll then be presented with the following “More information required” screen. Click Next.
5. When the Microsoft Authenticator page is shown, install the Microsoft Authenticator app on your mobile phone if you haven’t done so previously. Then, click Next.

6. The next MFA setup screen is titled “Set up your account”.

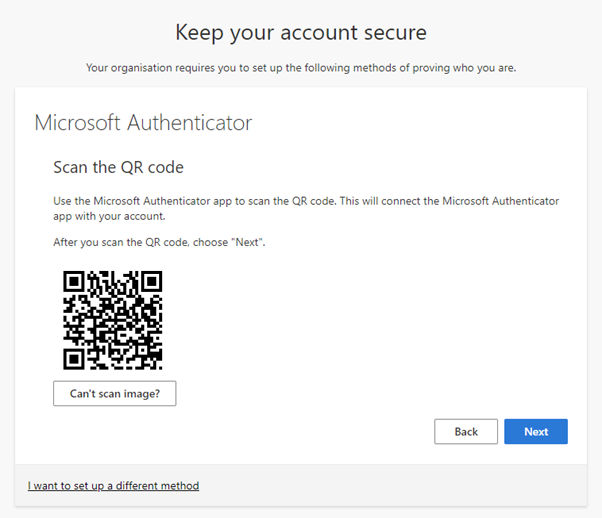
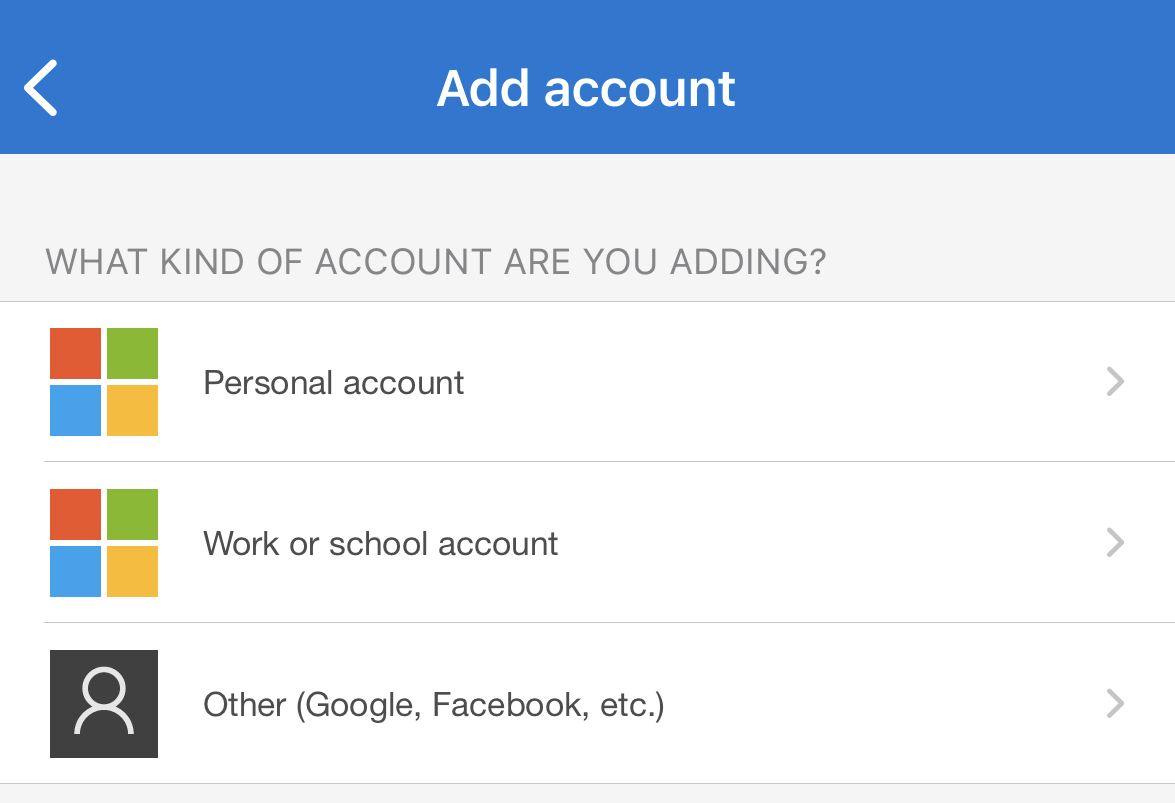
7. Open the Microsoft Authenticator app, click the (+) button in the top-right corner and choose “Work or school account” from the list. You will be presented with two options: “Sign In” and “Scan QR code”. Choose "Scan QR code" and allow the app access to your phone's camera if necessary.

8. Back on the MFA Setup website, click Next and you will be presented with a QR code. Scan this QR code (within the Microsoft Authenticator app) as instructed.
If you have trouble with the QR code, use the "Sign In" option instead.
9. If prompted to sign in, enter your University email address and password.
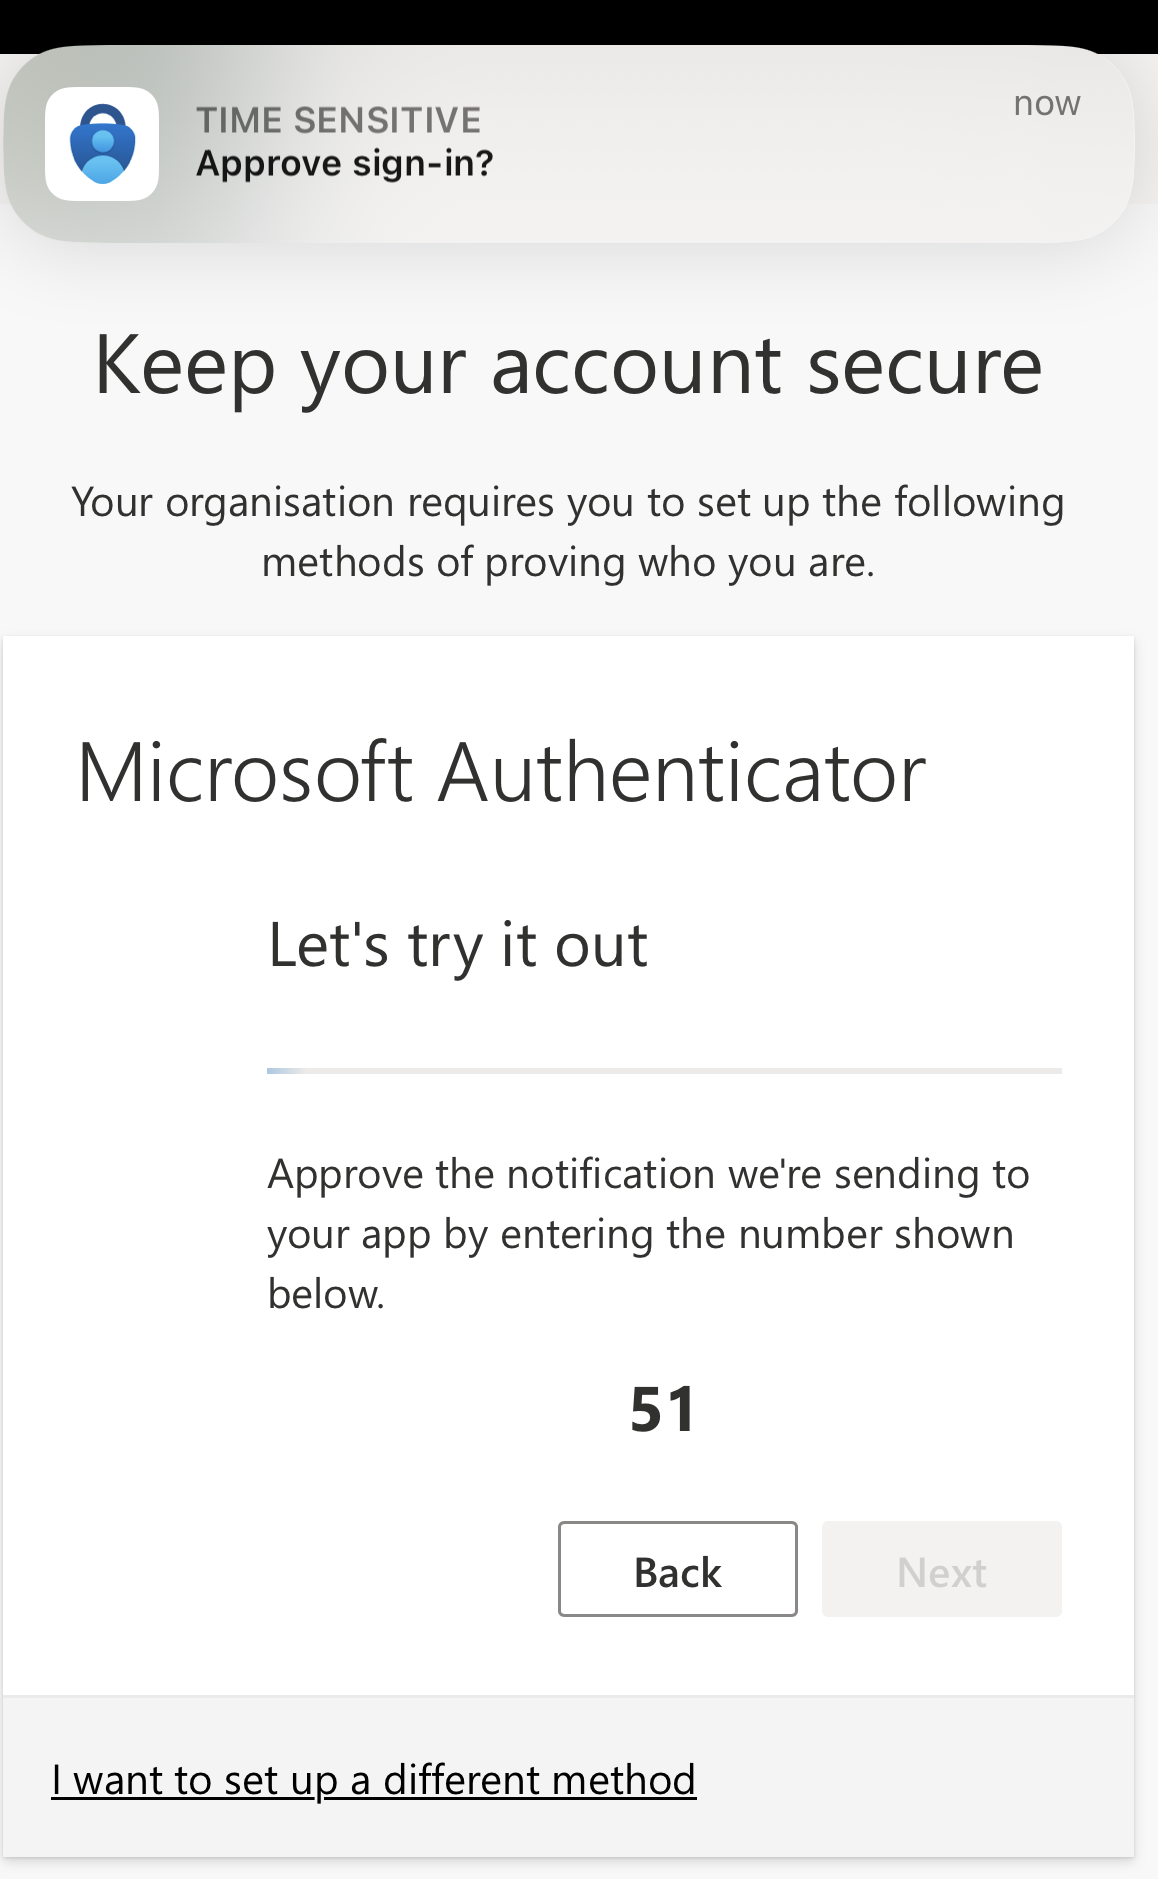
10. After completing the setup in the Microsoft Authenticator app, you will be asked to test the approval process. You must complete this test, or the setup will fail! Follow the instructions on the screen; usually, this involves entering a two-digit number into a pop-up on your app.
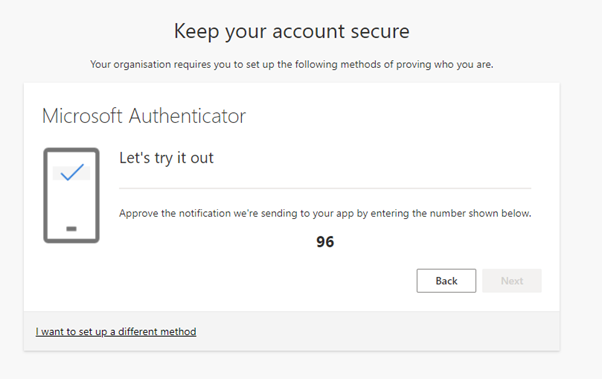
11. If the approval is successful, click Next.

12. On the Success screen, click Done. You will be taken to your Microsoft account security settings page, which you can now close.

If you previously used the Microsoft Authenticator app, you can remove any old accounts.
13. After setting up your MFA, go to https://www.microsoft365.com/.
14. Ensure that you can sign in using your University account and access Microsoft web apps such as Outlook.
Find out more about MFA on the Microsoft website: https://support.microsoft.com/en-gb/office/set-up-your-microsoft-365-sign-in-for-multi-factor-authentication-ace1d096-61e5-449b-a875-58eb3d74de14.
Please do not use private browsing or incognito mode when completing the MFA setup.
Before you start: If you have used the Microsoft Authenticator App with your University account in the past, we suggest that you delete it from the App before following the instructions below to re-register. You may also need to follow these instructions to remove the account if, at any stage, your MFA setup fails and you need to start again.
1. Launch the Authenticator App on your mobile phone and select any accounts linked to the University.
2. Click the Settings cog in the top-right corner.
3. Click "Remove account".
4. In the pop-up, choose "All apps on this device".
Now proceed to register your MFA using the instructions below.
1. In your default mobile browser, go to https://aka.ms/mfasetup.
2. You will be presented with the Microsoft login page. Enter your @student.norwichuni.ac.uk (for students) / @norwichuni.ac.uk (for staff) University email address and click Next:
3. If prompted, enter your University password and click Sign In.
4. You'll then be presented with the following “More information required” screen. Click Next.
5. When the Microsoft Authenticator page is shown, install the Microsoft Authenticator app on your mobile phone if you haven’t done so previously. Then, click Next.

6. The next MFA setup screen is titled “Set up your account in the app”.
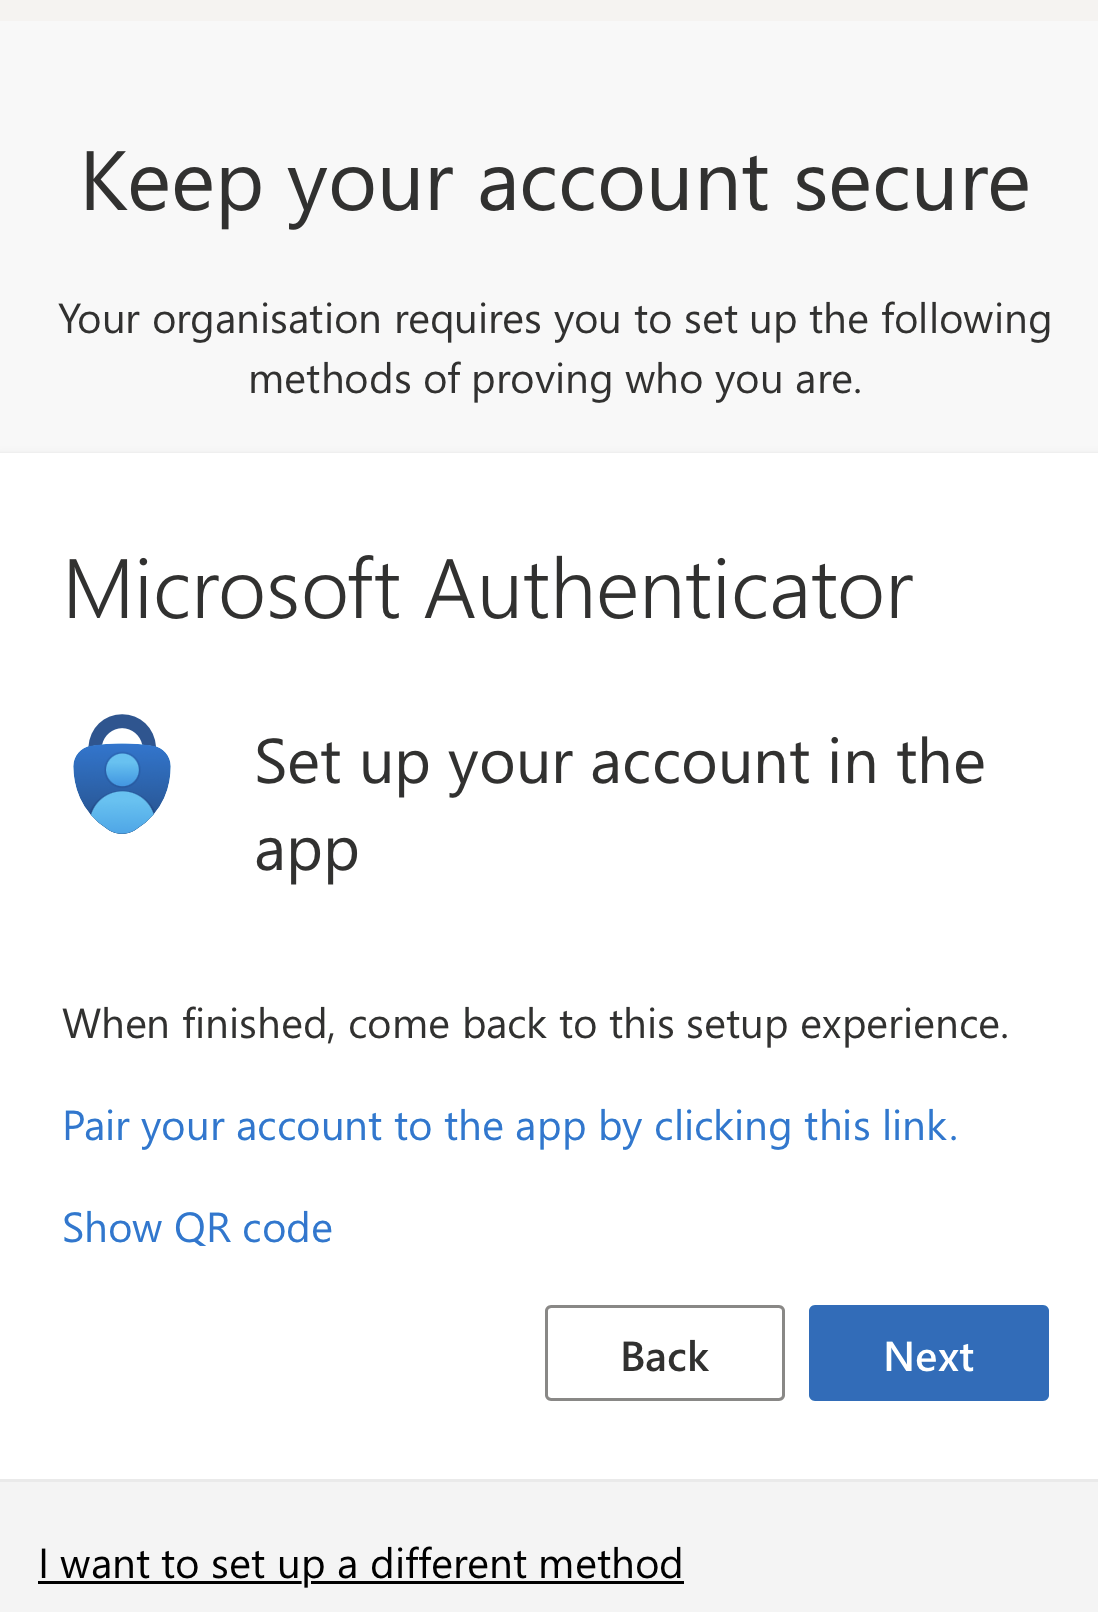
7. Click "Pair your account to the app by clicking this link". Or, open the Microsoft Authenticator app and click the (+) button in the top-right corner. Choose “Work or school account” from the list. You will be presented with two options: “Sign In” and “Scan QR code”. Choose "Sign In".

8. If prompted to sign in, enter your University email address.

9. Then, enter the password associated with your University account.

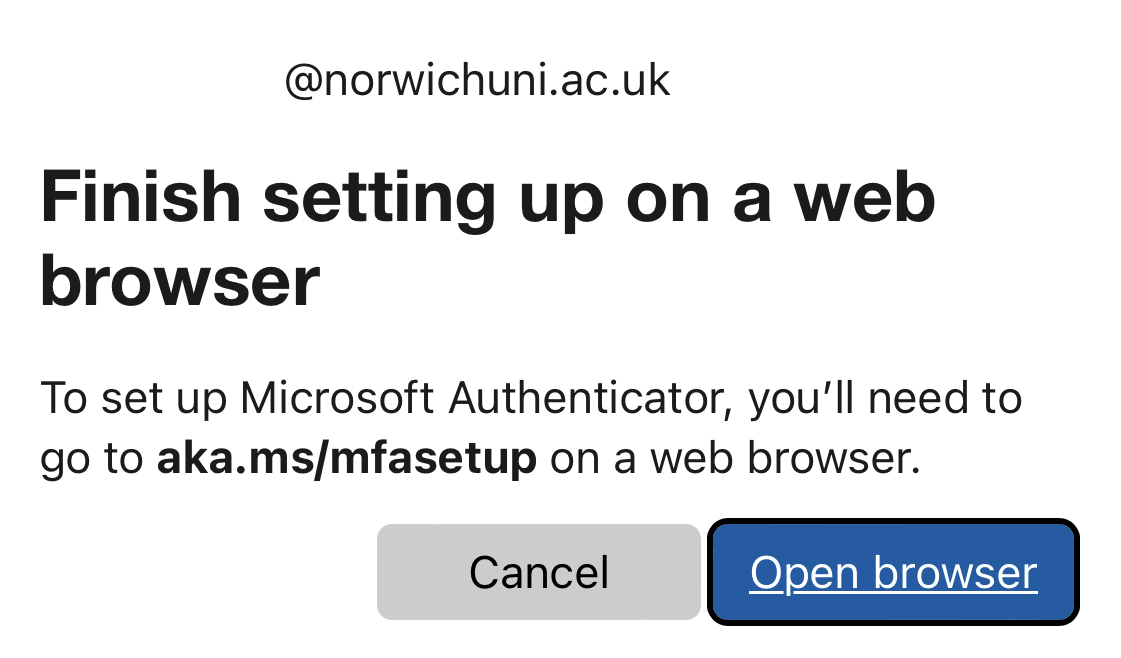
10. You'll be asked to continue the setup in your mobile browser. Click "Open browser".
11. After completing the setup in the Microsoft Authenticator app, you will be asked to test the approval process. You must complete this test, or the setup will fail! Follow the instructions on the screen; usually, this involves entering a two-digit number into a pop-up on your app.
12. If the approval is successful, click Done.

If you previously used the Microsoft Authenticator app, you can remove any old accounts.
13. After setting up your MFA, go to https://www.microsoft365.com/.
14. Ensure that you can sign in using your University account and access Microsoft web apps such as Outlook.
Find out more about MFA on the Microsoft website: https://support.microsoft.com/en-gb/office/set-up-your-microsoft-365-sign-in-for-multi-factor-authentication-ace1d096-61e5-449b-a875-58eb3d74de14.
Not using the Microsoft Authenticator App?
View answers to common questions about the Microsoft Authenticator app by clicking here.
The instructions above assume you are using the Microsoft Authenticator app on your phone. We strongly recommend using the Microsoft Authenticator app, as this will allow us to provide you with a higher level of support. You can use other authenticator apps, such as Authy and Google Authenticator. You can also use a personal phone number (phone call or SMS) as your authentication method, but we do not recommend these methods as they are easier for hackers to exploit. We've covered these other methods in the section below.
Using a third-party authenticator app:
1. If you choose not to use the Microsoft Authenticator app, click "I want to use a different authenticator app" when you are first presented with the Keep your account secure page.

12. Follow the instructions presented on the screen using your chosen app.
Using a personal phone number (phone call or SMS):
1. If you choose to use a phone call or SMS as your authentication method, click "I want to set up a different method" when you are first presented with the Keep your account secure page. Choose Phone from the drop-down menu.

2. Enter your phone number and follow the instructions on the screen to complete the setup.
Need further support?
Students
Visit us: Guntons Building, 1st Floor, Student IT Helpdesk/Design Studio (Monday to Friday 09:15 - 17:00)
Email us: helpdesk@norwichuni.ac.uk (Student IT Helpdesk)
Phone us: 01603 977777
For Library services, call 01603 751469 or email library@norwichuni.ac.uk
Once your account has been enabled, you can visit our IT Help pages on the VLE.
Staff
Please call us on 01603 751499. Once your account has been enabled, you can use TOPdesk to log support calls and view our knowledge base.